Faux-P1
Build in progress

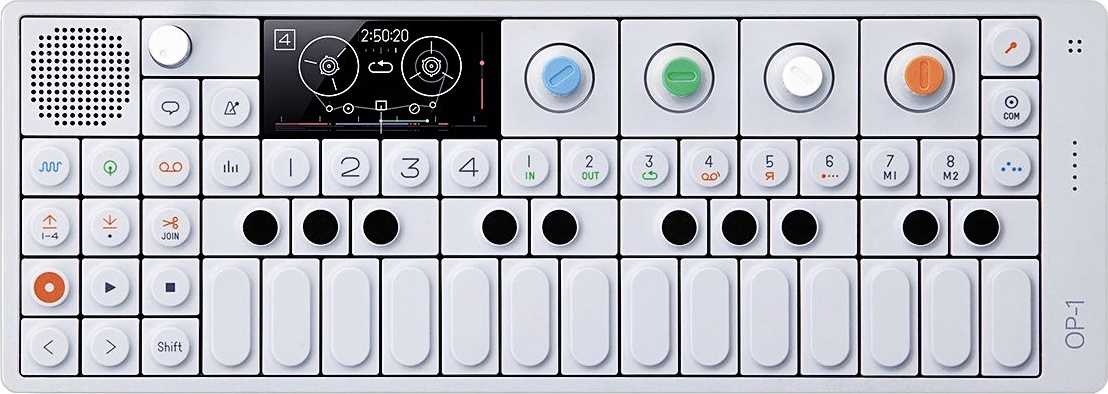
The Teenage Engineering OP-1 is lovely. The user interface is whimsical and minimal, making parameters with a technical opaqueness into a series of macro knobs to just change the sound. It becomes a simple and straightforward way to get involved with making noises without getting bogged down in the engineering aspect of it.
I've wanted an OP-1 for awhile. I could just buy one and have fun with it, sure. But I like getting lost in the engineering weeds. I'm a hacker, which means I'm wholly incapable of looking at a device and not wondering if I could build one that can do more.
That question tends to stop being "if" and usually becomes "how."
At the end of the day, all electronic hardware is some confluence of components. Without considering anything about the processing going on under the hood of the OP-1, you can take a look at it and see that it consists of the following:
- 4x knobs that endlessly spin (rotary encoders)
- An OLED screen
- A speaker
- 54x buttons
- One knob that has a maximum and mininmum (potentiometer)
All of this is wired in some way to a processor to translate what it means when you push a button or twist a knob. Simple enough.
Hardware
| Done | Qty | Item |
|---|---|---|
| ✓ | 1 | Raspi 4B 8GB |
| ✓ | 54 | Cherry MX Switches |
| ✓ | 3 | 5x6 Neokey boards |
| ✓ | 1 | 2.8" DSI LCD Panel |
| ✓ | 4 | RGB backlit rotary encoders |
| ✓ | 54 | Assorted keycaps |
| ✓ | 1 | Teensy 3.5 |
| ✓ | 1 | Adafruit Quad DAC |
| ✓ | 2 | Adafruit panel mount USB extension |
| ✓ | 1 | ZynADAC RasPi Sound Card |
To replicate that setup, we'll need to use similar components. I like things that light up with whatever color I want them to, so components that will let me do that are preferred. I'm also very much interested in modular design - being able to swap things out and reconfigure them is always fun. But I want to keep the basic layout the same as the original OP-1 because I think it's a nice, compact design. So for the buttons, I chose to use mechanical keyboard switches. This way, I can mount whatever key caps I want to them and can set up the button layout however I want.
The only reason I'm using a Raspberry Pi here is because the underlying software is designed specifically for it, as is the sound card that Zynthian makes. Unfortunately, this particular project would be hard to move to a different board because of the amount of work that's gone into developing a low-latency audio subsystem specifically for the RasPi's chipset.
Chalk this one up to "let's get rid of all the Raspberry Pi hardware I have so I can move on with my life." I'm half-thinking about setting up a dedicated engine using either a Teensy 4.1 or a ZRNA Akso board, but haven't quite decided whether or not I want to quite yet.
Roadmap
✓ Design keyboard layout
✓ CNC mill a keyboard plate
✓ Mount switches in plate
✓ Mount RGB Encoders
✓ Mount Display
3D Print Case
Controller Wiring to Teensy 3.5
Solder full keyboard matrix
Solder RGB encoders to I2C Bus
Solder Quad DAC to I2C Bus
Solder audio jacks to ZynADAC
Connect All Peripherals
2.8" LCD to RasPi DSI
Teensy 3.5 to RasPi USB
Panel mount USB extensions
Software Setup
Install Zynthian
Program Teensy 3.5 as HID & MIDI device
Map keyboard to Zynthian CUIA actions
